Browsing Category

recipes & crafts

recipes & crafts

Homemade Chicken Chunks

Every since I tried this recipe for chicken chunks (aka boneless chicken wings) the boys beg me to make it pretty much every week. I use a large bag of frozen chicken breasts from Kroger, the 3 pound bag, and everyone chows every last bite. We dip them in a basic ranch or Anchor Bar medium wing sauce as well as this yummy Southwest Ranch dip I found at Kroger a couple of weeks ago (Kroger brand). You have to try this recipe, I promise you it’s one meal you won’t have any leftovers!

Chicken chunks recipe

The recipe is from Blog Chef and I just found a recipe for Teriyaki Chicken Wings. I was addicted to Hooters Teriyaki boneless chicken wings for like 5 minutes…until I seen they are like 700 calories for 10 wings. Wow! I’ll have to let you know how the Teriyaki ones turn out once I try them.

Boneless Chicken Wings

Ingredients:
3 boneless skinless chicken breasts, cut into 1” chunks *I use 3 lbs chicken to feed 6 people
Oil, for deep frying
1 cup all purpose flour
2 teaspoons salt
½ teaspoon ground black pepper
½ teaspoon cayenne pepper
¼ teaspoon garlic powder
½ teaspoon paprika
1 egg
1 cup milk

Directions:
1. Heat oil in a deep-fryer to 375 degrees. In a large bowl combine flour, salt, black pepper, cayenne pepper, garlic powder, and paprika. In a small bowl whisk together egg and milk. Dip each piece of chicken in the egg mixture, and then roll in the flour mixture. Repeat so that each piece of chicken is double coated. Refrigerate the breaded chicken for 20 minutes. (*Sometimes I don’t have time to refrigerate before cooking and they still turn out just fine.)

2. Fry chicken in the hot oil in batches until the outside is nicely browned and the juices run clear (about 5 minutes per batch). Drain on paper towels. Repeat until all of the chicken is gone.

3. Mix fried chicken bits with your favorite wing sauce or serve your own sauces on the side.

Finger licking good!

PRINTABLE RECIPE JUST FOR YOU!!

recipes & crafts

Cheddar Bay Biscuits

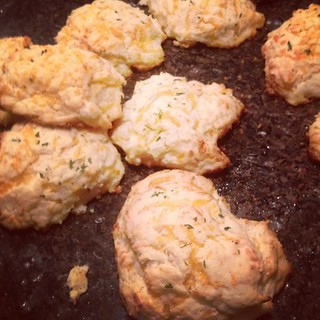
You know those amazing biscuits from Red Lobster? Or Ruby Tuesday? I found a recipe on Big Oven the other day and thought I would try them out. They were delicious!! They tasted just like the ones at Red Lobster. I thought I would share the recipe. Just don’t blame me when you eat them all!

I made my own cheddar biscuits just like those from Red Lobster or Ruby Tuesday's...and they were quite yummy!

Cheddar Bay Biscuits

Ingredients:
2 1/2 cups Bisquick baking mix
1 cup Cheddar cheese; finely grated
3/4 cup Whole milk
2 tablespoons Butter
1/8 teaspoon Garlic powder
1/4 cup Butter
1/2 teaspoon Garlic powder
1/2 teaspoon Dried parsley flakes
1 dash Salt

Directions:
1. Preheat your oven to 400 degrees.

2. Combine Bisquick with cheddar cheese, milk, 2 tablespoons of butter that has been melted in the microwave, and 1/8 teaspoon garlic powder in a medium bowl. Mix until well-combined.

3. Drop approximately 1/4-cup portions of the dough onto an ungreased cookie sheet.

4. Combine 1/4 cup butter with 1/2 teaspoon garlic powder, parsley flakes and salt. Brush this mixture over the tops of each unbaked biscuit.

5. Bake for 14 to 16 minutes or until the tops of the biscuits begin to turn light brown. Serve warm.

PRINTABLE RECIPE JUST FOR YOU

recipes & crafts

Chinese Dinner

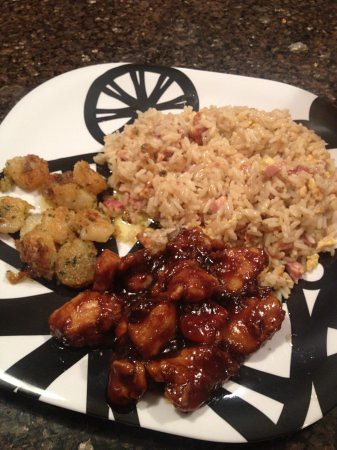
Ham fried rice, shirmp scampi, Tso Chicken

Ever since we tried this recipe for Ham Fried Rice we have never made just plain rice. I don’t always add the ham, but it sure is yummy with it. I also tried a recipe for General Tso Chicken and it was pretty close to your standard General Tso Chicken that you get from a Chinese restaurant. The shrimp you see in the photo is just your basic frozen shrimp cooked in garlic and butter. I can only imagine the calories of this meal…I made all of this last year (aka-before the diet).

Here is where I found the recipes:

General Tso’s Chicken

Ham Fried Rice

They both were really delicious and I highly suggest them both!

What are your favorite websites for finding recipes?

recipes & crafts

Ice Cream Sundae Kit

I realize it’s almost two weeks past Christmas and here I am still sharing things about our day. I literally have a list of about 10 things I would like to blog/vlog about. Hopefully soon I will get caught up and be writing about current things instead of being a week behind! I couldn’t share this post prior to Christmas though or the recipients would have seen their gift.

I made these really cute Ice Cream Sundae Kits for Ken and I’s siblings this year for Christmas. The idea came from a photo I seen on Pinterest. Are you on Pinterest? Follow my pages here. You can spend hours on there looking at all sorts of cool stuff from fashion, to food & recipes, vacations and more. The original idea for the Sundae Kit came from the blog Family Bites. I thought it was a really cute idea so I bought the stuff to create my own kits.

Ice Cream Sundae Kit

Steps Involved:

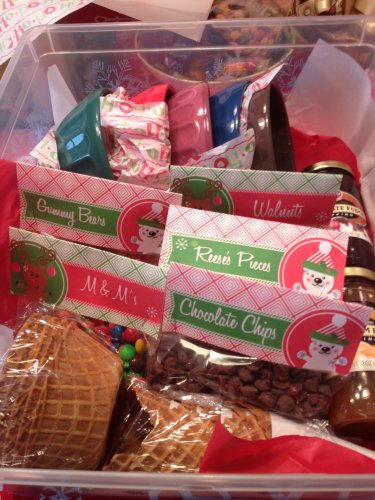
1. First I purchased these bowls from Anthropologie. The original idea didn’t have any kind of bowls involved, but I wanted there to be something left to enjoy once all the goodies were eaten.

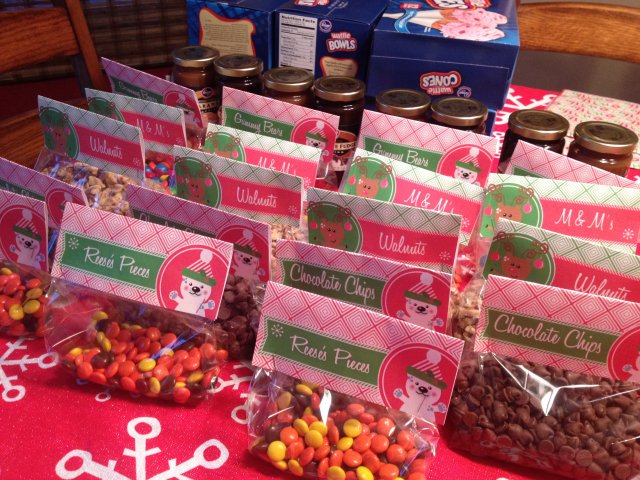
2. I purchased all the goodies- M & M’s, Reese’s Pieces, Walnuts, Gummy Bears, and Chocolate Chips and clear bags to put them in.

3. I created labels on the computer using a template from a site called Anything but Perfect and I edited and resized them to fit my bags.

Ice Cream Sundae Kit

4. I purchased waffle bowls and cones and wrapped them in plastic wrap. I also purchased a jar of fudge topping and caramel topping.

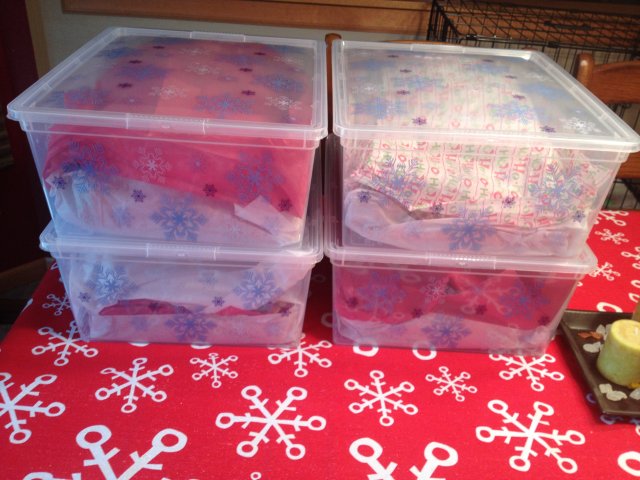
5. I bought plastic containers that had snowflakes on them to hold all of the items. I used tissue paper in between all the bowls as well. I also covered everything with tissue paper to hide the gift until it was opened. Now they have a container that they could reuse for something as well.

TaDa! I thought they turned out pretty neat and I was happy that everyone seemed to like them. Everyone loves ice cream!! This could be a great gift for any occasion really.

Ice Cream Sundae Kit

recipes & crafts

Best Chili Ever

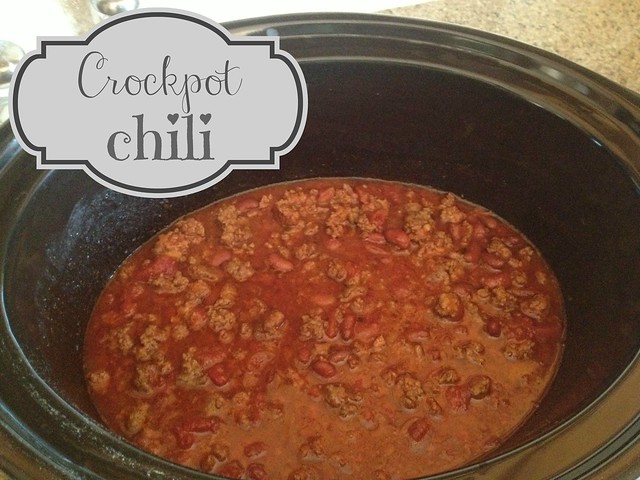
Crockpot Chili

I’ve tried so many chili recipes over the years it’s crazy. I finally found one that I really really liked! Even Ken said it was super spectacular and whatever he says is always right. LOL I especially love chili that can be made in a crock pot. Not sure why, I know it’s the same as throwing everything in a pot on the stove. Something about it just tastes better.

The recipe I used is from Favorite Family Recipes– but I tweaked it a bit so below is how I made it with the actual brand names of the products I bought as well. The original recipe I worked off of can be found here.

Crockpot Chili

2 lbs. ground beef
1 Tbsp. minced onion
1 15oz. can chili, no beans – Hormel
2 16oz. cans chili beans, Bush’s
1 can diced tomatoes, Kroger’s chili ready
3 5.5oz. cans of tomato juice, Campbells
1 Tbsp. chili powder
salt & pepper to taste

Brown ground beef in a skillet. Drain grease and add minced onion. Regular onions can be used, but my kids don’t like seeing the onions so I used these instead. Mix together the cooked meat and the rest of the above ingredients in a crock pot. Cook for about 3 hours on low. Add chili to spaghetti noodles and top with cheese and/or sour cream. So delicious!!

You have to try this recipe and let me know if your recipe for chili is better than this. If it is…send it to me!

PRINTABLE RECIPE JUST FOR YOU

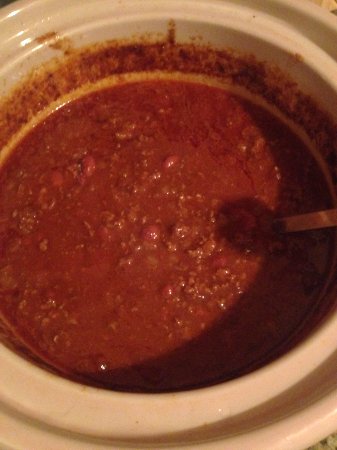
Delicious Crockpot chilli

Subscribe to our blog feed – Our Family Nest Blog
Subscribe to our YouTube Channel – Our Family Nest YouTube Channel
And like us on Facebook! Our Family Nest Facebook Page

recipes & crafts

Easy-way Christmas Cookies

Christmas cookie cutouts

I made 17 dozen cookies on Saturday in about 3 hours. Karli helped me for a little while, but the boys wanted nothing to do with it.

This is the easiest recipe to make Christmas Cut-out cookies. There are just a few simple steps involved in making the best sugar cookies ever. Better than granny’s family recipe or the latest trend you find online I promise.

Christmas Cutout Cookies
Ingredients:
Car
Cash

Directions:
1. Drive to Gordon Food Service
2. Purchase a box of Precut Cookie Dough (72 cookies in a box)
3. Return Home
4. Cram as many cookies as you can on a baking sheet.
5. Bake at 375 degrees for 12 minutes.
6. Allow to cool
7. Decorate as desired.

I had Andrew run to the grocery store because I didn’t realize I was out of food coloring. Of course he came back with NEON colored food coloring. That’s okay…I actually ended up liking the colors. Who says you have to have red and green cookies at Christmas! I also had some sprinkles and peppermint pieces that I had also purchased from Gordon Foods to decorate the cookies with.

Sent Andrew to store to get food coloring and he came home with NEON colors.  Actually love it! Good job Andrew ;)

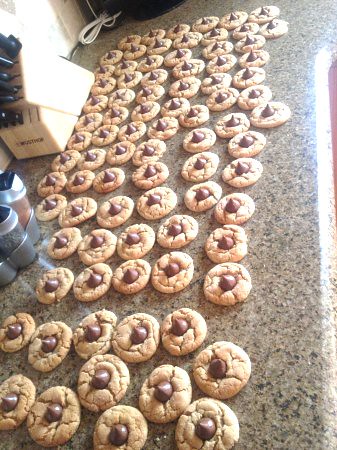
Peanut Butter Kiss cookies are my all time favorite. Some people call these cookies Peanut Butter Blossoms, which makes no sense to me- Kiss Cookies sound better. These cookies are just as easy to make if you choose to ignore the part of your brain that is telling you to make the peanut butter cookies from scratch. You can choose the easy route and purchase premade peanut butter cookie dough in a roll from Pillsbury. You simply form 1 inch balls of dough, roll the ball in sugar and bake. Then you immediately add the chocolate Hershey kiss when you pull the cookies from the oven. Viola! Another 6 dozen cookies completed.

Kiss cookies

I also made a couple dozen chocolate chip cookies. Yep, I bought the premade dough for these too. I don’t always take the easy way out. I do have a great sugar cookie recipe that my mom’s friend gave her several years ago. I just didn’t feel like getting flour all over the place and spending twice as much time for the same result. I spent all day Saturday cleaning and decluttering my kitchen so come Sunday I was ready to just get the cookies made and be done. Trust me, if my kids don’t care how I made the cookies, I certainly don’t care. I’ve never understood why people made their own frosting from scratch either. I love the Duncan Hines Whipped Vanilla Frosting! Tastes perfect to me – why mess with what works?

recipes & crafts

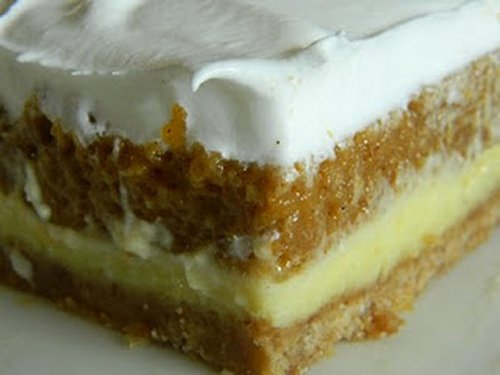
Yummy Pumpkin Torte

Yummy Pumpkin Torte

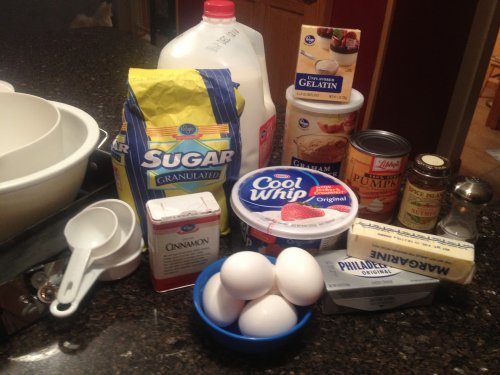
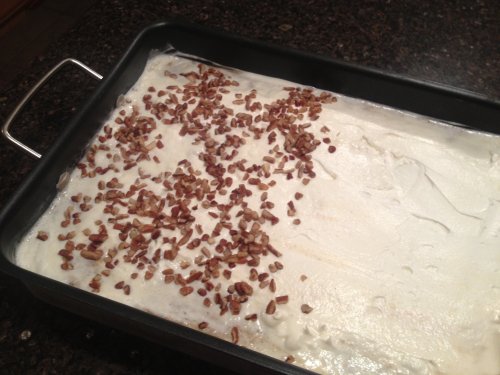
I wanted to share one of the yummiest pumpkin recipes ever. My mom has made this for years. It’s the one dessert that everyone always asks her to make for holiday parties. If you love pumpkin pie you will absolutely love this tasty pumpkin torte. It is made of 4 layers which we all know that layered recipes are a pain in the rear, but it’s worth it I promise! The first layer is crunchy graham crackers, the second a cream cheese mixture, the third is the yummy pumpkin layer, and the topping is a cool whip and nuts if you so desire.

Yummy Pumpkin Torte

Pumpkin Torte

LAYER ONE
1 1/2 cups graham cracker crumbs
1/3 cup sugar
1/2 cup butter
3/4 tsp. cinnamon
Mix together and press into 9×13 pan.

LAYER TWO
3/4 cup sugar
8 oz. cream cheese, softened
2 eggs, beaten
1/2 cup milk
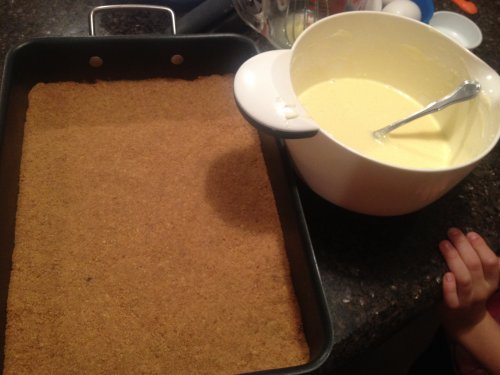
Mix together cream cheese and sugar. Add milk and beaten eggs. Pour over crust. Bake for 20 minutes at 350 degrees. Cool completely.

Yummy Pumpkin Torte

LAYER THREE
2 cups pumpkin mix
3 egg yolks
1/2 cup sugar
1/2 tsp salt
1 tbsp cinnamon
1/2 tsp nutmeg
Mix and cook in pan until mixture thickens slightly, about 10 minutes. Remove from heat.

1 envelope unflavored gelatin
1/4 cup cold water
Dissolve gelatin in water and add to hot pumpkin mixture. Cool.

3 egg whites
1/4 cup sugar
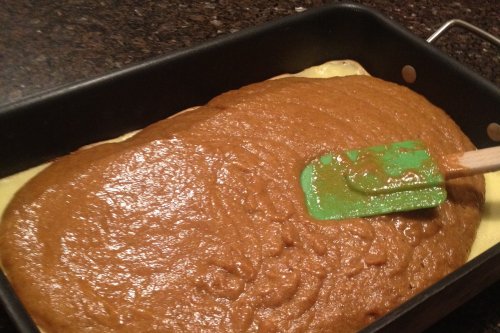
Beat egg whites and gradually add sugar. Fold into pumpkin mixture. Pour over cooled crust.

Yummy Pumpkin Torte

LAYER FOUR
Cool Whip, 2 bowls if you like it thick
Nuts, pecans or walnuts
Spread on top and refrigerate until serving.

PRINTABLE RECIPE JUST FOR YOU

Yummy Pumpkin Torte

My mom usually only covers half of the torte with nuts in case people don’t like them, so I did the same. My biggest tip is to absolutely make sure the layers are cooled completely before moving on. Put your pan in the freezer to cool faster. Especially when putting the last cool whip layer on. If the pumpkin is still warm it melts the cool whip. One time mine started melting and the cool whip started to mix with the pumpkin so I ended up mixing the two layers together. It still tasted fine, but just not the right way to do it. Also I have noticed that I have a hard time getting one bowl of cool whip to entirely cover the dessert completely. I suggest buying 2 bowls of cool whip to be safe. I am sure you can find something else to use the leftover cool whip for. Or if your kids are like mine they eat the stuff straight from the container! Ewww!

Enjoy!

recipes & crafts

Pigs in the Blanket and PF Changs Lettuce Wraps

Despite the fact that cooking this meal caused my kitchen drain to clog up, I still wanted to share both of these recipes with you because my husband said they were the best ever. Well wait, I guess the cooking didn’t cause the drain problem, it would have been the rice noodles that I shoved down the sink afterward. Oops.

When I was younger my mom made Pigs in the Blanket (Stuffed Cabbage Rolls) or us all the time. I hated the cabbage part, but I remembered the filling being oh so yummy! I chose this recipe from Food.com, which you will find here. I chose to follow the directions for 12 cabbage rolls, but you are able to change the amount on the website to fit your needs. I also chose this recipe because it called for the use of burger and italian sausage, which I thought would give it more flavor.
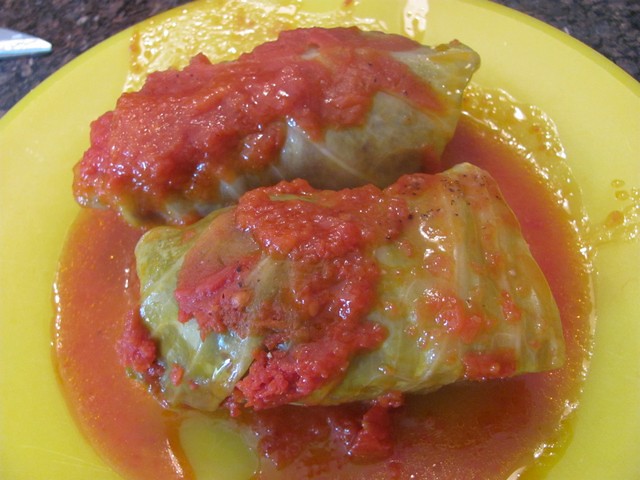
Pigs in the Blanket

Pigs in the Blanket

Ingredients
1 lb lean ground beef
1/2 lb pork sausage
3/4 tablespoon garlic salt
1/2 tablespoon sweet paprika
1/4 teaspoon black pepper
1 cup white rice, cooked and cooled
1/2 large cabbage
2 (14 ounce) cans whole canned tomatoes, crushed with a fork
16 ounces chicken broth ( organic or homemade is best)
1/2 to taste olive oil, to coat roasting pan
1/2 to taste salt and pepper

Directions
– Wilt head of cabbage in large pot of boiling water for 5 minutes. Remove cabbage from pot, cool slightly and separate leaves, taking care not to break the leaves.
– Mix ground beef, sausage, cooked rice, garlic salt, paprika and pepper. Form 3 inch balls. Place meatball into cabbage leaf and fold leaf around the ball. Place roll into a large square of cheesecloth, cover and twist ends of the cloth to shape and tighten the roll. Remove cabbage roll and repeat until all filling is used.
– In a large roasting pan which has been coated with olive oil, place layer of cabbage rolls (folded side down), cover with 1 can of tomatoes, and repeat. Pour chicken broth over the layers.
– Preheat oven to 325 degrees F. Cover roasting pan and bake for 2 hours or until until cabbage is tender.

I also wanted to try out a recipe that closely duplicated PF Changs Lettuce wraps. I love them so much! I read several websites before settling on this recipe from Wasabimon.com, found here. They were so yummy and tasted amazingly close to PF Changs. I could eat them every week they were so good!
Note: I didn’t make the pouring sauce because I didn’t have all the ingredients and I had read that the pouring sauce really isn’t necessary.
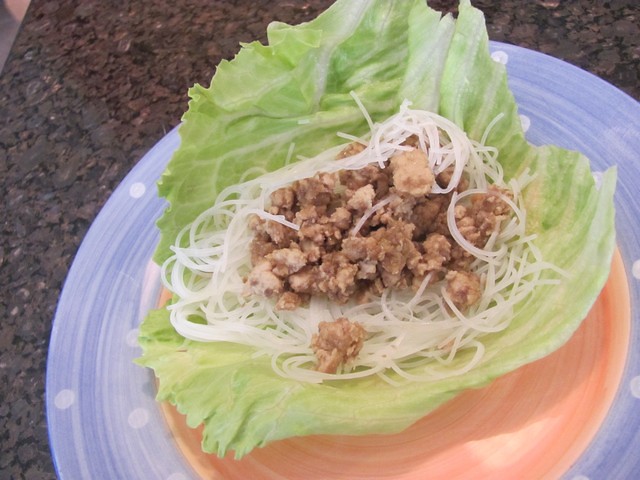
copycat PF Changs Lettuce wraps
Wanna-be PF Chang’s Lettuce Wraps Recipe

Ingredients for pouring sauce:
1/4 cup sugar
1/2 cup warm water
2 tablespoons gluten free tamari (or regular soy sauce if you’re not concerned about gluten)
2 tablespoons rice wine vinegar
2 tablespoons ketchup
1 tablespoon lemon juice
1/8 teaspoon sesame oil
1 teaspoon hot water
1 tablespoon dijon mustard
2 cloves garlic, minced

Ingredients for stir-fry sauce:
2 tablespoons soy sauce
2 tablespoons brown sugar
1/2 teaspoon rice wine vinegar

Ingredients for chicken stir-fry:
2 tablespoons extra virgin olive oil
2 tablespoons sesame oil
2 boneless skinless chicken breasts, cubed to 1/2″
1 – 8oz can sliced water chestnuts, minced to the size of corn kernals
1/2 cup mushrooms, minced to the size of corn kernals
1/2 onion, chopped fine
3 cloves garlic, minced fine
6 large leaves of iceberg lettuce or nappa cabbage

To make the pouring sauce:
– In a large bowl, dissolve sugar in 1/2 cup warm water, then add soy sauce, rice wine vinegar, ketchup, lemon juice and sesame oil. Mix well and throw in the fridge until you’re ready to eat.
– Just before serving, combine 1 teaspoons hot water with dijon mustard and garlic and mix in small bowl. – Add to the pouring sauce, 1/2 a teaspoon at time to taste.

To make the stir-fry sauce:
– Prep the stir fry sauce by mixing soy sauce, brown sugar, and rice vinegar in a small bowl.

To make the chicken stir-fry:
– Combine oils and add to wok or large frying pan. Heat oil over high heat until it glistens, about one minute. Add chicken and saute until mostly cooked through, about 5 minutes.
– Turn the heat under the wok down to medium-high. Add another tablespoon of olive oil to the pan, wait one minute, and then add garlic, onions, water chestnuts, mushrooms, and the stir-fry sauce you prepared earlier. Stir-fry everything until the mushrooms have cooked through, about 4 minutes, and remove to a serving dish.
– Serve stir-fry with iceberg lettuce or nappa cabbage leaf wraps and top with pouring sauce.

* I choose to cook up some rice noodles to wrap inside the lettuce wraps along with the chicken stir fry. I Ken ate his without the rice noodles and loved them that way as well.