Sharing my first attempt at making my own cookie dough and frosting from scratch…and sharing the recipes with you!
Back in October I had written a short list of things that I had on my TO DO list. How ironic is it that while so many are writing about their goals for 2013, I am going to write about the things that I have accomplished. YES! See that is the thing- you should always continue to make goals, you should always be thinking of ways to better yourself. The part that so many people forget to take the time for is acknowledging the goals that you have accomplished. Am I right?
So I’m going to toot my own horn hear and say that I actually made some pretty darn good cookies this year. As I mentioned in the other post, I had purchased a bunch of supplies to make these cookies before Halloween and for whatever reason I never got around to making them. The guilt set in and the weekend before Christmas I decided it was time to see if I could make these fancy pants cookies that I have seen so many others make. I wanted the perfect looking frosted ones, not the ones where you just use a butter knife to smear frosting all over the cookie.
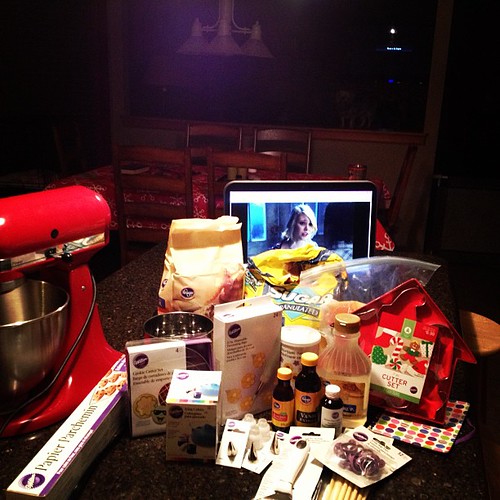
I set up my laptop to watch listen to Gossip Girl and gathered all the supplies. I was most excited about being able to use my KitchenAid mixer. Don’t tell me that you don’t think playing with kitchen appliances is fun, you know it is!
The dough I made smelled so good. I’ve made dough from scratch before, but I can’t recall whether or not the recipe called for almond extract. I don’t think I will ever try another sugar cookie recipe again, this one was absolutely perfect. The perfect combination of sexy and cute. Whhhhaaa? That is just a line from Crazy, Stupid, Love, one of my favorite movies that I just finished watching. I’ve only seen it about 6 times!
The dough recipe that I used is from Bake at 360. The site is full of information. They have tons of video tutorials as well. I tried a couple of the methods for rolling out the dough and I ended up doing a mixture of them all. I taped a long sheet of wax paper to my countertop and I used 1/4 inch wooden rods that I also taped down to use as a guide because I can’t roll out dough very evenly without a guide. I used wax paper on top of the dough for awhile, but ended up just using flour on top of the dough instead. I also laid parchment paper down on my cookie sheets as the videos on the website recommend, which is something I have never done before. I just left the parchment paper on the cookie sheet and used the same one over and over again.
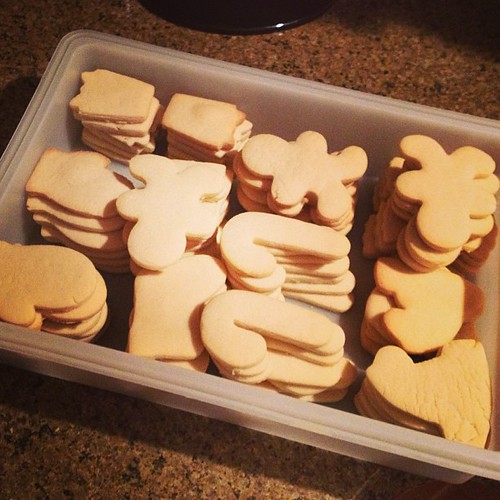
I had doubled the recipe and it made 7 dozen cookies. The cutouts I used were on the smaller side. Bake at 350 suggests freezing your cutout cookies on the cookie sheet for 5 minutes before baking and I did not do this. As for baking time the recipe suggests 10-12 minutes and I used the entire 12 minutes which was surprising because my oven usually takes less time than stated on most recipes. I would test it out a bit to see what works best for you.
I ended up cutting out and baking all the cookies and decorating them the next day. I knew it would take me awhile to make the frosting and mix the colors and such since it was my first time making frosting from scratch. I also LOVED this frosting recipe, which I also found at Bake at 350. I doubled this recipe as well and had more than enough and made several different colors. Make sure if you use this frosting recipe you do keep your containers covered with saran wrap as the frosting will dry up pretty quickly.
FLOODING!!! I was most excited about trying the outlining and flooding methods used to make these fabulous cookies! When you do these methods you have to thin out your frosting to put it in a squeeze bottle to flood the cookies. This calls for a bit of planning until you are comfortable with predicting how much of each color to set aside for outlining and how much for flooding. I ended up doing all my outlining first and then flooding last. I had my entire island countertop covered in cookies and frosting. It took me several hours to decorate all of the cookies, but I was so proud of myself at how well they turned out. As you can see I did used some sparkly sprinkles as well. So fun! Be sure to check out the Bake at 350 website for all of their awesome tutorials and cookie decorating ideas. Let me know if you have any questions on how I made these cookies. Also let me know of any websites that you use for cookie decorating.
These photos don’t quite show the details of the outlining and flooding like I wish they would. Again, I need to start using my Canon camera. I definitely don’t have the most steady hands and I loved how your lines didn’t have to be perfect to create a nicely decorated cookie. Not to shabby for my first time, right?
I seriously can not wait for the next holiday to make more cookies. Probably Valentine’s Day!




3 Comments
I’m impressed! I can’t bake AT ALL. I burn everything. Whatever sugar cookie recipe Cheyenne uses it also calls for almond extract, it does make them good!
Thank you! I am still shocked I didn’t burn them or that they didn’t taste like crap!
Nice Job Love. The Cookies were great. Tasted good and all of your effort paid off.